Are you looking for a highly profitable micro-SaaS idea with low overhead costs?
QR codes are absolutely everywhere today—from restaurant menus and real estate signs to digital business cards and product packaging. Businesses are actively paying monthly subscriptions for dynamic QR codes (which can be edited after printing), analytics, and custom branding.
But instead of being just another user paying expensive monthly fees to third-party platforms, what if you owned the platform?
In this guide, we will show you exactly how to build your own white-label QR code SaaS directly on WordPress. No coding required, no expensive third-party cloud fees, and most importantly: no clunky WooCommerce integrations.
By using a powerful, self-hosted ecosystem called QRcdr PRO, you can launch a fully automated, recurring-revenue business in a single afternoon. Let’s build it step by step.
Why Build Your Own QR Code Generator?
If you are a web agency, a marketer, or a solopreneur, creating a self-hosted QR code SaaS offers incredible advantages.
When you resell or use popular alternatives (like Beaconstac or QR Code Generator Pro), you don’t own the platform, and you don’t own the data. By hosting it on your own WordPress site with QRcdr PRO, you get:
- 100% Profit Margins: You keep all the subscription revenue.
- Total Data Privacy: Your clients’ data stays securely on your server.
- A Clean Ecosystem: No need to patch together a membership plugin, a payment gateway plugin, and a QR plugin. Everything is built-in natively.
Ready to become a SaaS founder? Let’s jump into the setup.
Step 1: Install QRcdr PRO and Auto-Generate Your Pages
The biggest headache of building a SaaS on WordPress is usually the setup phase. QRcdr PRO makes this surprisingly simple.
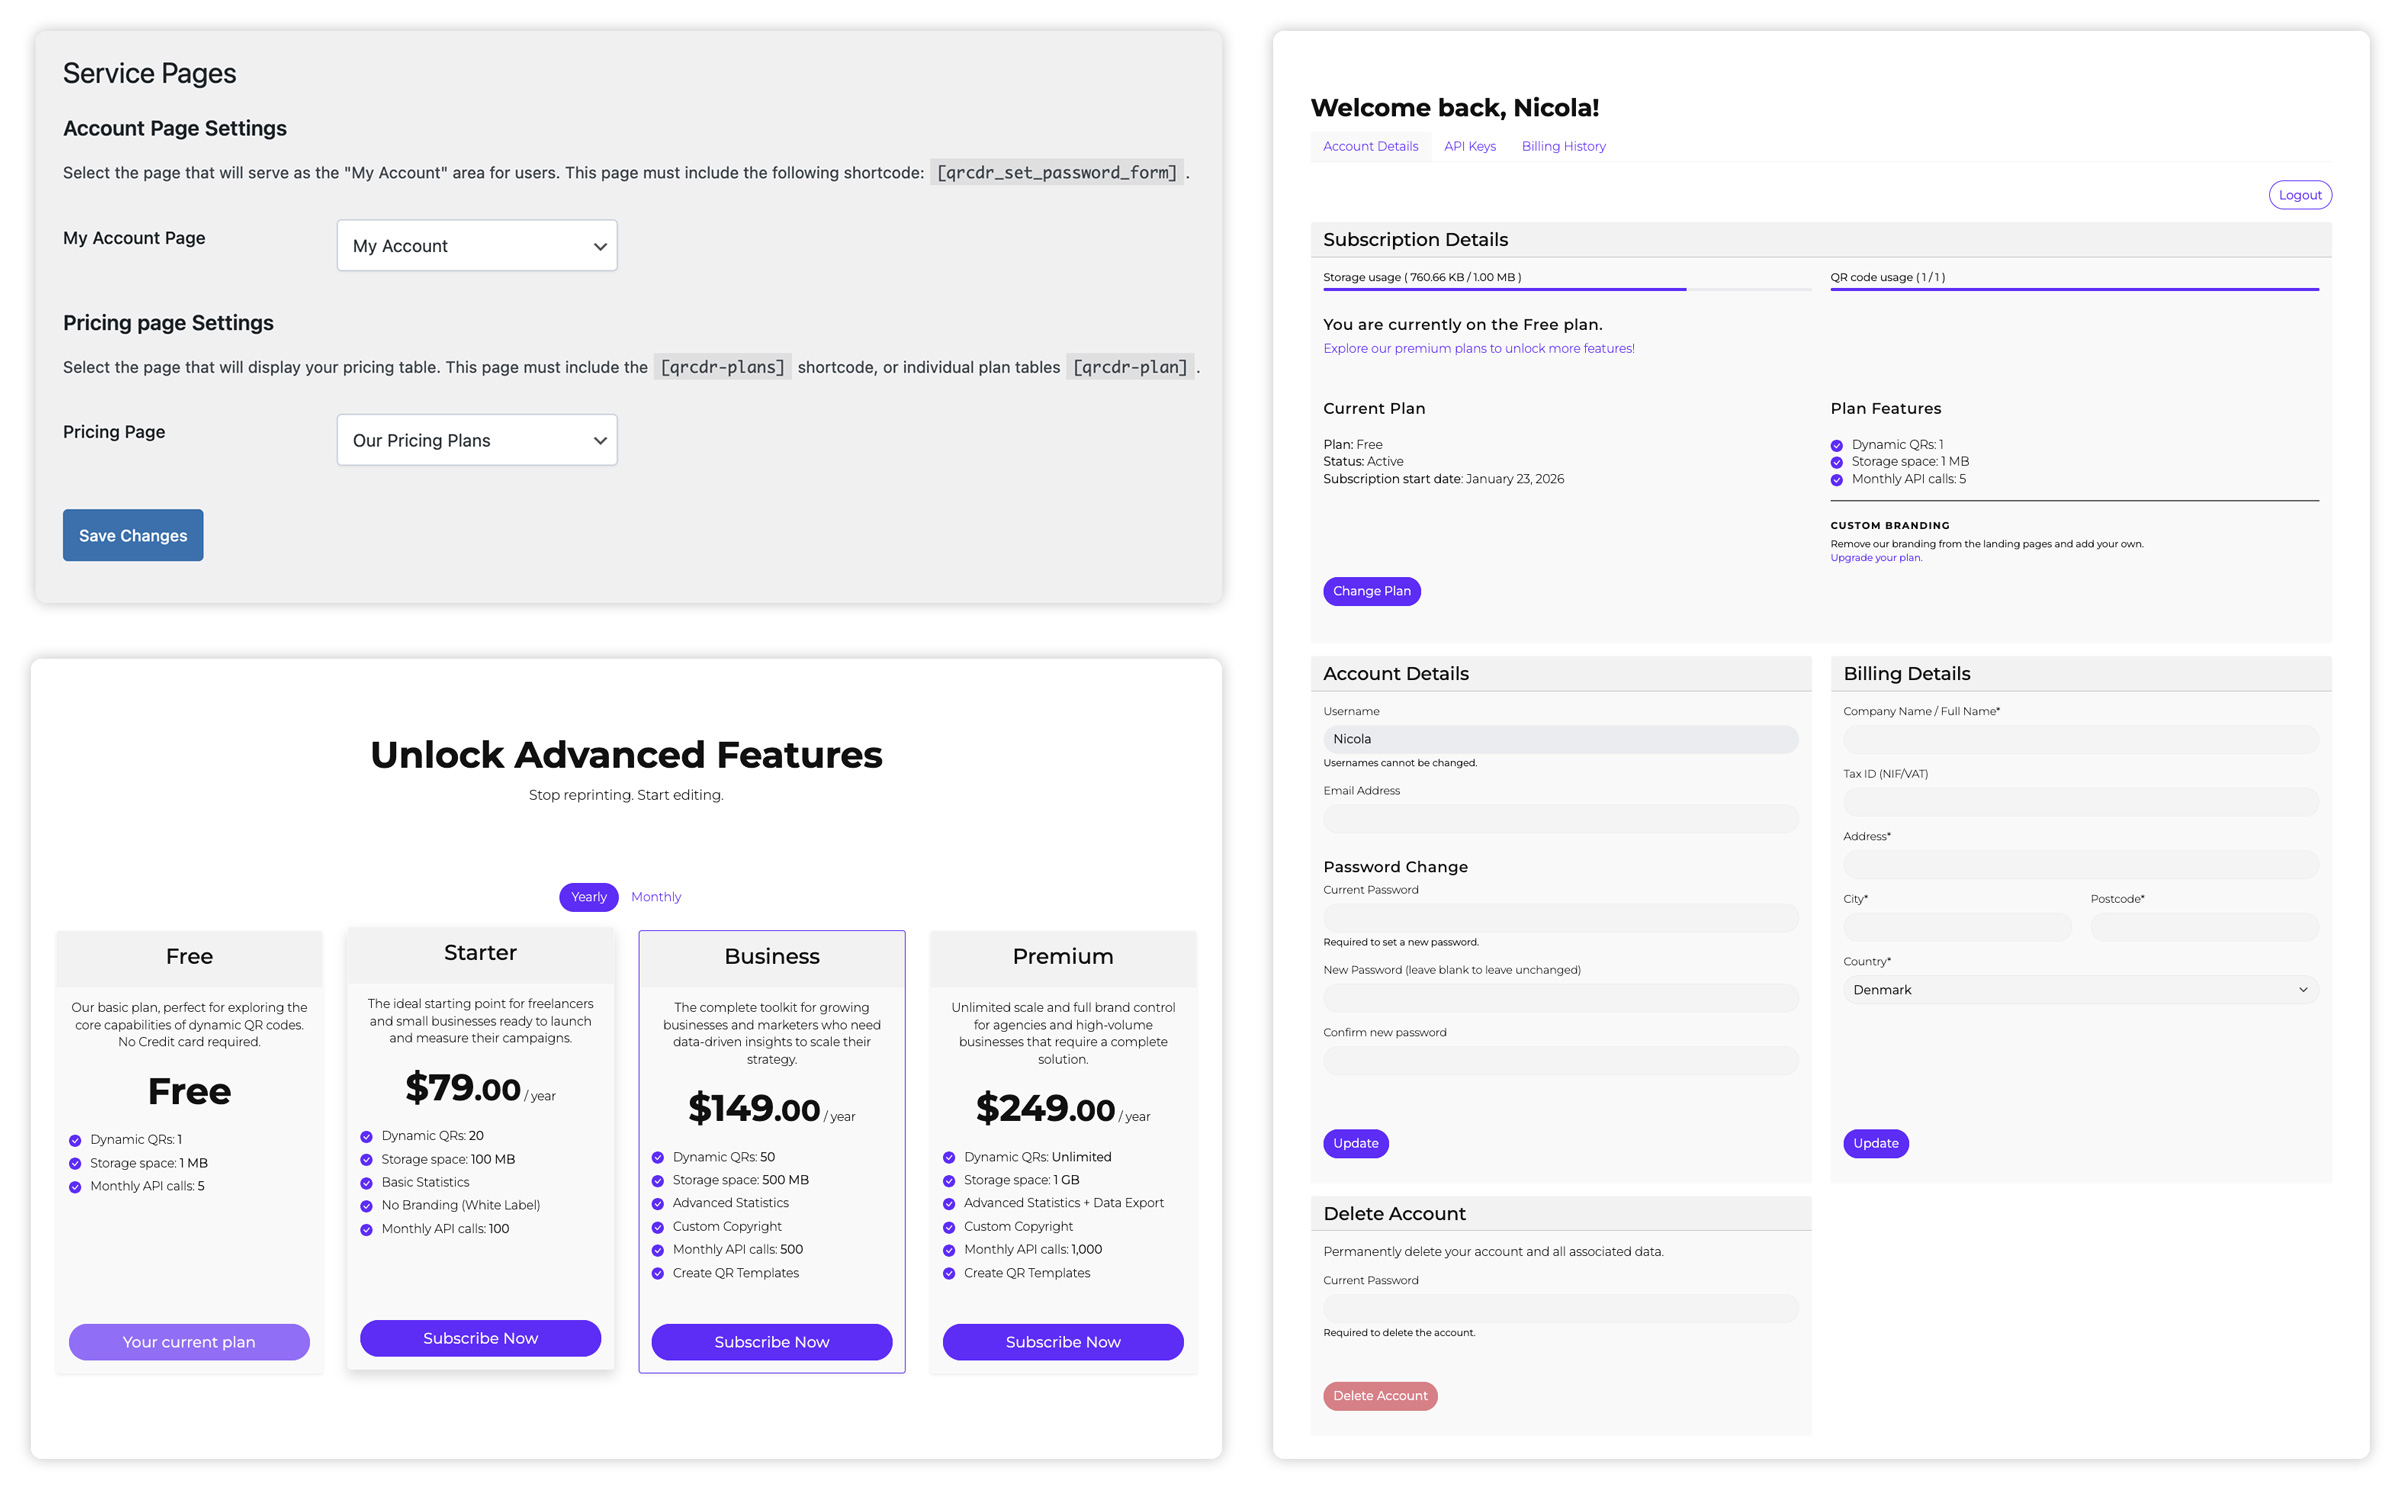
Once you purchase and activate the QRcdr PRO plugin, the heavy lifting is done for you. Upon activation, the plugin automatically creates the essential utility pages—specifically the “My Account” area and the “Pricing” page—and automatically inserts the necessary shortcodes into them.
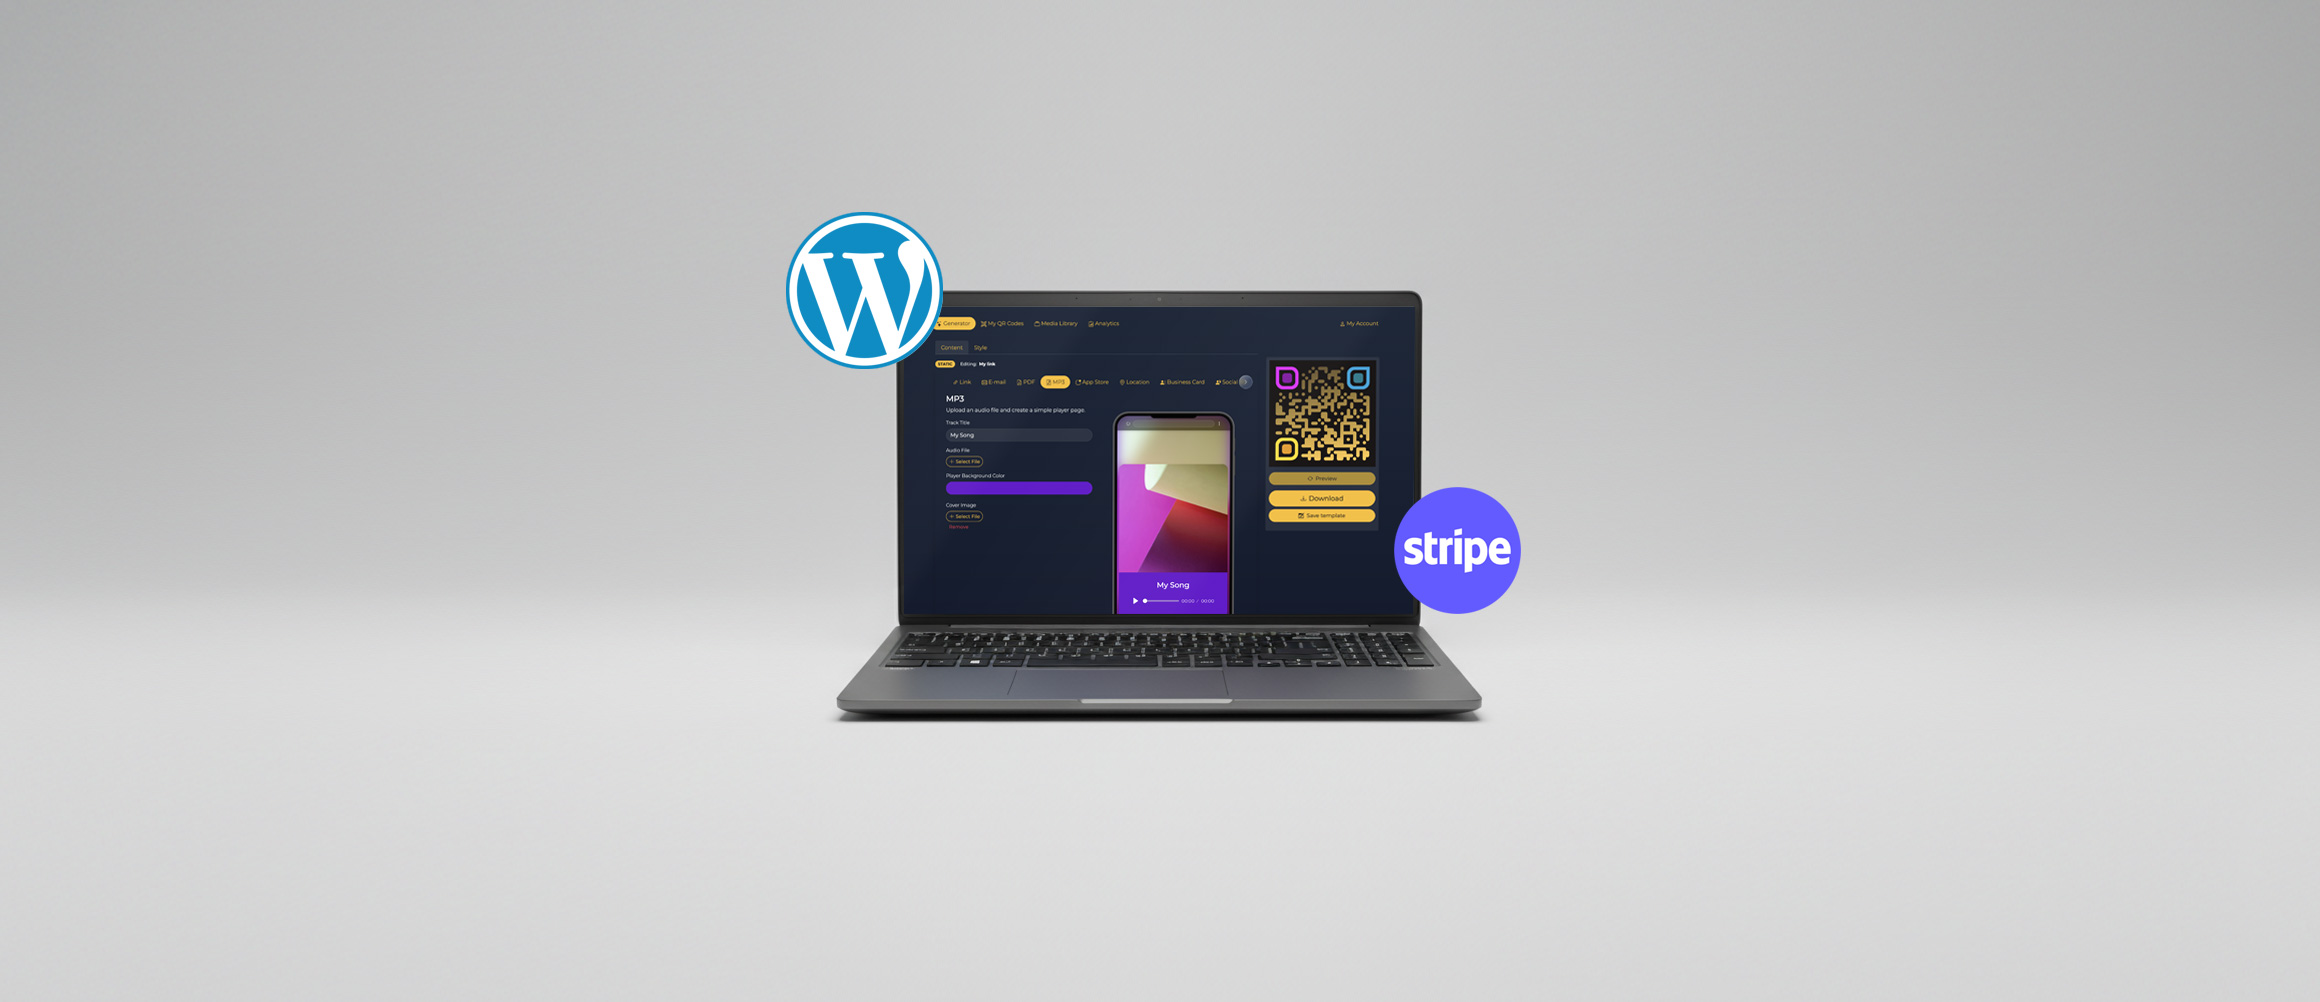
To display your actual application, simply open any WordPress page (like your homepage) and add the QRcdr block via Gutenberg, or use the main shortcode. Instantly, a sleek, modern QR Code Generator will appear on your frontend.
If you ever decide to design your own custom pages instead of using the auto-generated ones, you can easily remap them by navigating to QRcdr -> Pages in your WordPress dashboard:
- Account Page Settings: Select your custom page that will serve as the “My Account” area for users. This custom page must include the
[qrcdr_set_password_form]shortcode. - Pricing page Settings: Select the custom page that will display your pricing table. This page must include the
[qrcdr-plans]shortcode (to show all plans), or individual plan tables using[qrcdr-plan].
Step 2: Connect Stripe for Native Subscriptions
Now that your generator is visible, let’s talk about the most important part: getting paid.
The most powerful feature of QRcdr PRO is that you do not need WooCommerce or any external membership plugins to sell subscriptions.
It has a fully native billing engine built inside.
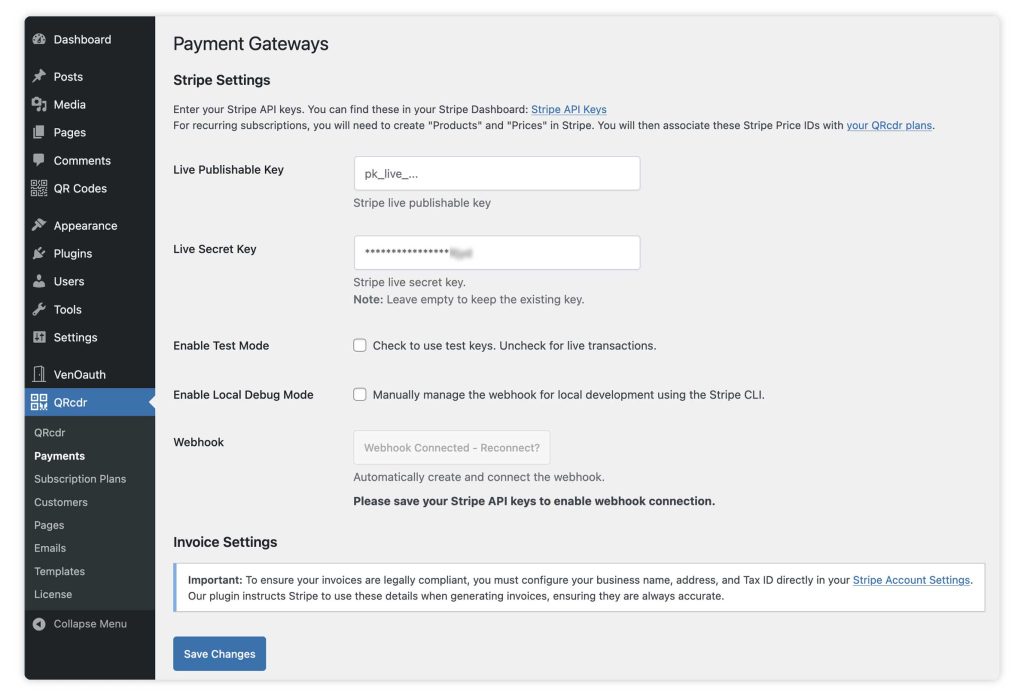
- Go to QRcdr -> Payments in your WordPress backend.
- Select Stripe as your gateway.
- Paste your Stripe API Keys (Publishable and Secret keys).
- Paste the Webhook secret to ensure your site automatically updates user accounts when a recurring payment goes through.
That’s it. Your platform is now ready to process credit cards and manage automated recurring billing.
Step 3: Create Your Subscription Plans & Set Quotas
Why will businesses pay you every month? Because you are going to offer them premium features, advanced data, and white-label branding.
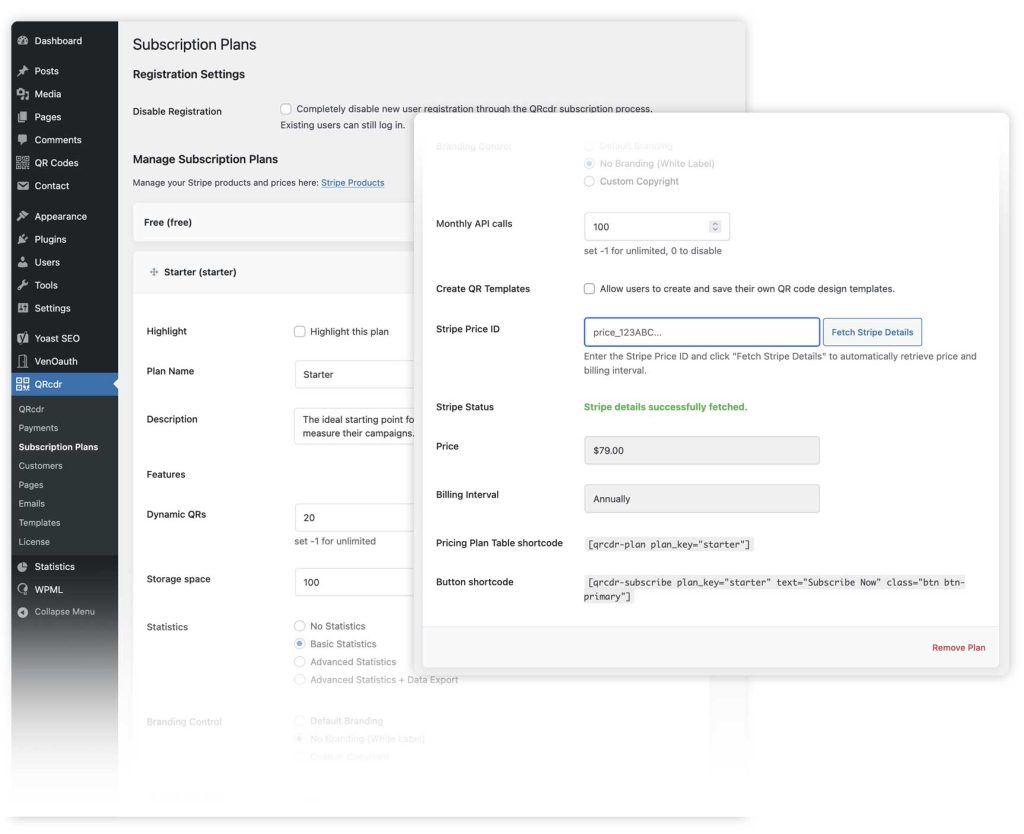
To configure what your users get, navigate to QRcdr -> Subscription Plans. The platform allows you to create infinite combinations of plans (e.g., Free, Starter, Pro, Agency).
This is where you act as a true SaaS founder, controlling server resources and strategically building feature tiers to push users to upgrade. For each plan, you can customize the following:
- Plan Name & Description: Tailor the messaging for your target audience.
- Dynamic QRs: Set the maximum number of editable QR codes allowed (or enter -1 for unlimited).
- Storage Space: Set a quota (in MB) for hosted media like PDFs, images, or MP3s. For example, give Free users 5MB, and Pro users 500MB.
- Statistics: A huge upselling tool. You can restrict analytics based on the tier: No Statistics, Basic, Advanced, or Advanced + Data Export.
- Branding Control: Control the footer credits on the dynamic QR landing pages. Offer Default Branding on cheap plans, and upsell No Branding (White Label) or Custom Copyright on premium plans.
- Create QR Templates: Allow premium users to design, save, and reuse their brand’s custom QR styles.
- Monthly API Calls: Perfect for developers or agencies who want to generate static QRs remotely, list their dynamic QRs, or fetch stats via API.
The Billing Magic: Stripe Price ID Sync
You don’t even have to manually type the prices to match your Stripe account. QRcdr PRO handles this flawlessly. Simply enter the Stripe Price ID for the plan and click “Fetch Stripe Details”. The plugin will automatically retrieve the exact price and billing interval directly from Stripe. This guarantees a perfectly consistent system with zero risk of pricing errors between your WordPress frontend and your payment gateway.
Step 4: The Frontend User Experience (The Magic of the Media Library)
You might be wondering: “If users are uploading PDFs and images to my server, do they need access to my WordPress backend?”
Absolutely not. Your users will never see the WordPress dashboard. Everything happens on a beautiful frontend interface.
When a user registers and logs into their account (via the My Account page you set up in Step 1), they access their personal dashboard.
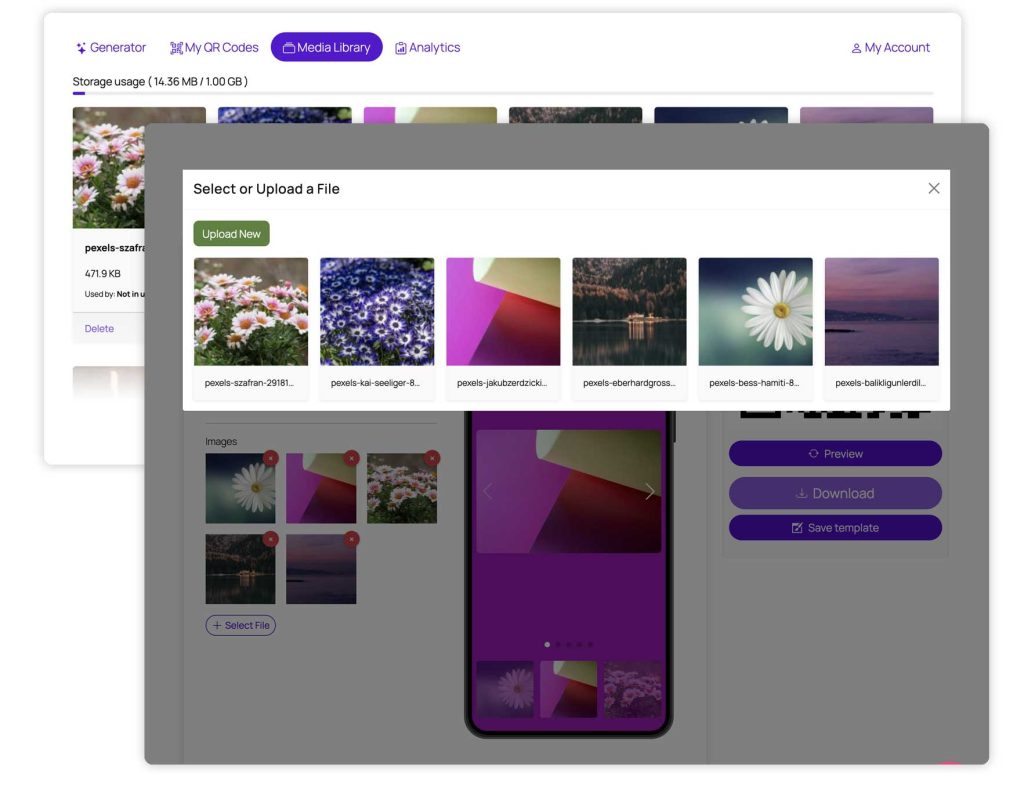
When they choose to create a dynamic QR code—let’s say, a PDF QR code—a sleek Media Manager popup appears directly in the generator.
From this frontend Media Library, your clients can:
- Upload new PDFs, images, or audio files.
- Select previously uploaded files to reuse them.
- Delete old files to free up space if they are hitting the storage limit you defined in Step 3.
It is a completely frictionless, professional SaaS experience.
Step 5: White-Labeling & Finishing Touches
To make the platform truly yours, you need to brand the communications and the design.
Head over to QRcdr -> E-Mails. Here, you can customize the HTML templates for all automated communications: welcome emails, password resets, and subscription updates. Add your agency’s logo and custom messaging to ensure a premium feel.
Pro Tip for better conversions: If you want to offer an enterprise-level experience right out of the gate, consider getting the QRcdr Bundle.
It includes the Templates add-on, which allows you (the admin) to design stunning, pre-set QR code styles (custom frames, logos, brand colors). Your users can then apply these professional styles to their QR codes with a single click.
The ROI: A High-Profit Business Model
Building a custom SaaS from scratch usually costs tens of thousands of dollars in development. Even white-labeling existing platforms usually requires hefty monthly fees.
QRcdr PRO changes the game entirely with a Lifetime License model (which includes 1 year of updates and premium support).
- Standard License: $299 (For 1 website)
- QRcdr PRO Bundle: Starting at $349 (Includes QRcdr PRO + Templates Add-on + VenOauth for one-click Google / social login).
Let’s look at the Return on Investment (ROI).
If you charge your clients a standard market rate of just $29/month for access to your dynamic QR platform, you only need 10 to 12 subscribers to completely pay off your software investment in the very first month.
Everything after that is pure, recurring profit.
Test Drive the Platform Today
Don’t just take our word for it. Step into the shoes of your future paying customers and experience the platform yourself.
Head over to the QRcdr PRO Demo and create a free account. You will instantly get access to the Free Tier (which includes 1 Dynamic QR and 1 MB of storage).
- Test the beautiful frontend user dashboard.
- Generate your first Dynamic QR code.
- Explore the frontend Media Library and see how easy it is to manage files.